Popular Posts

Wednesday, May 5, 2010

Sound Ministry Series Part 2 - Setting Channel Gains

The "gain" control (sometimes called 'trim' or 'level') is the first control knob you encounter at the top of each channel on your mixing desk.

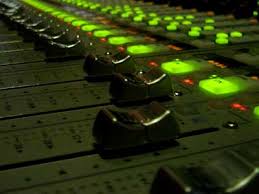
The purpose of this knob is to control the level of the input signal into that channel. If this control is not set correctly, you won't have adequate control over the volume of that channel when you use the fader/slider.

If the gain is set too low, the signal will be too weak and you may introduce system noise (sounds like hissing) as you turn up the channel to compensate. If it is set too high, you may introduce distortion which may damage your equipment, or the channel may feed back.

To set the channel gain is quite easy. Use the "Solo" button (or PFL on some mixers) on channel one to display that channel's levels in the visual meter on the far right of the desk. Next, have someone speak, sing or play into that channel alone at performance levels and turn up the gain until it just peaking into the orange/yellow. If it goes into the red, you are too high. If it stays in the bottom green, then ensure that the -20dB "PAD" switch is not pressed in on that channel.

Repeat for all channels. Remember to keep the volume low (or better, off) for this exercise.

Done! Now our channel gains are set. This will give you the best signal to work with, and if gains are correctly set it will be easier to balance your mix across the channels, because each fader will respond similarly to your adjustments.

Note: Mics will require large amounts of gain, so don't be surprised if you end up in the >75% range. Instruments will usually require less gain, especially if you are using DI boxes.

Next time: the PAD switch and the Low Cut filter.

Monday, May 3, 2010

Sound Ministry Series Part 1 - Setting Up

Before you even turn on the desk or the amp, you will need to set up. Start by plugging in everything (mics, instruments, etc.) so that you have the minimum to plug in when the system is on, which could damage the speakers. At this stage, turn on things like guitar amps and keyboards.

As you plug things in, remember to arrange things logically across the stage. It is good practice to use Ch 1 for whatever is furthest to the left of the stage, and then work across to the right from there, moving up the channels. Write down what (and who) is in each channel for easy reference. This way, the desk visually mirrors what is on the stage.

When everything is plugged in, turn on your desk first, and then your amplifier. This avoids the "bang!" of turning on the desk after the amp is on, which could damage the speakers.

As you approach the desk, never assume that the last mix is still applicable. If you have the luxury of time, this would be a good time to turn down all the faders and gains and zero the eq's.

Next time: Setting Channel Gains

Sound Ministry Series

After an amazing and encouraging workshop this last Saturday, I thought it would be helpful to start a series on the basics of sound operation. Very often, the guys behind the desk do what they can very willingly, but are not confident in their knowledge of the whole picture.

This series of short posts will start at the beginning and go through the stages of setting up and mixing for a Sunday service. God-willing, it will add confidence to what you are doing, expand your knowledge and help you serve the body of Christ better.

Lastly, thanks you so much for your valuable ministry!

Monday, April 19, 2010

Mars Hill Music - Some Do's and Don'ts

Mars Hill Church in Seattle (Mark Driscoll's church) have been producing some amazing worship music, and a lot of it is now available for download with a suggested donation.

I have recently downloaded their Rain City Hymnal EP, which is a collection of traditional hymns that have been rearranged, the Red Letter album, and the Good Friday Live Worship album. They have all blown my mind.

The interesting thing about them is this: it is always very obvious what Scripture passages the lyrics come from, the hymns all use the traditional words (thees and thous, and other very evocative, profound English words and phrases that have fallen out of common use) but the music is the edgiest, most creative combination of synths and grinding electric guitars, earth-shifting bass and gut-thumping drumming I have heard in ages! It seems like they're channeling the Seattle-sound in a big way. The version of Psalm 51 sounds like they had Soundgarden as the backing band!

You can read an interview with one of the worship pastors and band frontmen here.

Music like this, however, can raise some issues for us as local church musicians. Here are some helpful suggestions for things we can learn from this approach to church music.

  • DON'T try and mimic what is done at Mars Hill, unless you have some phenomenal rock musicians with pro quality gear, a 10, 000W PA system, a congregation of 3, 000.
  • DO learn to use what resources you have, just like Mars Hill has done. When you do a good job with what you have, you will have a solid foundation to build on. Jesus said in Luke 16 "Whoever can be trusted with very little can also be trusted with much". If all you have now is a violin and a guitar and singer or two, work hard with that and ask God to bless you with more.
  • DON'T use heavy rock for your worship services because that's what Mars Hill is doing.
  • DO think about your congregation and what music would suit them best. If it is heavy rock, then pursue that.
  • DON'T think that the only way to present these songs is to do them the same way Mars Hill have done.
  • DO learn to separate out the song itself. Use the chords that are downloadable from their website and try and do the song with just a voice and an acoustic guitar or piano. The strength of a good song is its ability to "carry" in a variety of musical contexts, not just the one it is written in.
Lastly,
  • DON"T get discouraged that your church's music will never be like Mars Hill's.
  • DO listen to these songs to be encouraged, get ideas and learn a thing or two about the variety that can be present in the music Christians use to worship God.

Friday, April 16, 2010

Using A Capo

Guitar player, love your capo! And learn to use it. It is one of the most valuable tools a guitarists has.

A capo is useful for
  • Playing simple chords in a difficult key.
  • Changing the sound of chords. This is important for when two guitars are playing together, because if one guitar uses a capo to play the chords in a different position, it can help the guitars to sound more distinct. You can also use it to "lighten" the sound of the guitar by playing the chords in positions higher up the neck.

The key to all of this is to learn the notes on your neck and learn your open chord shapes, and learn where the capo must go to play various chords. For instance, you need to know that placing the capo behind the 3rd fret and using the chords from the key of G (G, C, D, Am, Em) you will be playing in Bb. This is because your root note is now at the 6th fret on the low E, which is Bb.

Similarly, if you have the capo behind the 5th fret and you use the same chords, you will be playing in C. And if you use the capo behind the 4th fret and use the chords from the key of D (D, G, A, Bm, Em) you will be playing in the key of F#.

This does take learning, there are no shortcuts. Perhaps the best advice is to start thinking about the chords in songs in terms of their scale degrees instead of just their names. So in G, G=I, Am=ii, Bm=iii, C=IV, D=V, Em=vi and F#m=vii. Try and work out how chords in other keys relate to each other like this, and you will begin to become a musical demon! Then it becomes easier to 'translate' a chord to a different capo position.

Remember also that the capo functions exactly like your guitar's nut. In order for it to work properly it must be as close as possible behind the appropriate fret so that the strings break hard over the metal of the fret.

Troubleshoot:
  1. Setting the capo too far back from the fret will make the strings buzz
  2. Setting the capo skew will make the guitar sound out of tune
  3. A capo that is too tight will pull the strings out of tune, a capo that is too loose will make the strings buzz. If you can adjust the tension of your capo then great, otherwise it's time to go shopping.
  4. If you get all the above right and the guitar is still buzzing, sounding out of tune, etc., it's time to take it to the shop for a service.
Lastly, don't buy a rubbish capo. The best ones are by Shubb (http://www.shubb.com/), but Dunlop and Kyser also make great capos that are quick and easy to put on and take off, and can be clipped the headstock when not in use. The only problem with these is that they pull the strings slightly sideways because of the clamp action. (My favourite is the Dunlop Trigger capo http://www.jimdunlop.com/index.php?page=products/pip&id=67&pmh=products/capos)

If all of this is a bit complicated, never fear! Perhaps a video will help... watch this space!